Pages

Sunday, May 31, 2009

Roasted New Potato Salad Smothered in Chives


Roasted New Potato Salad Smothered in Chives accompanying some ribs and corn on the cob.

This recipe was more of a side-note than a real recipe in the latest edition of Cooking Pleasures magazine. I looked for it online so I could give you the link to click, but it wasn't there! I don't think it much matters since I didn't change much of anything. Just know Cooking Pleasures, June/July '09 gets credit.

Roasted New Potato Salad Smothered in Chives

1 lb. small new potatoes (Yukon Gold, if available), quartered -- I used red
1 tbsp olive oil
1/2 c mayonnaise
1/2 c fresh chives, sliced
1/2 tsp Dijon mustard
1/4 tsp course salt
1/4 tsp course pepper

Preheat oven to 400°F.

Toss potatoes with olive oil; spread on rimmed baking sheet.


Bake for 30 minutes or until potatoes are tender.

Meanwhile mix mayo, chives, mustard, salt and pepper.


Toss potatoes with mayo mixture.


That's it. Serve it up warm or at room temp.


Simple potato salad in 45 minutes without a bunch of weird crunchy crap you have to pick out.
Winner!

Cost:
  • baby red potatoes: $2.39/lb
  • chives: $2.29/living plant
Total: $4.68 and had enough for Rodney and I plus a little left over.

Not bad, eh? Eat with Honey and Apple Ribs and corn-on-the-cob. Trust me, they all went well together.

I don't think this needed so much mayo. Next time I'll cut that back from 1/2 to 1/3 cup. Make it more zingy and less goopy.


Saturday, May 30, 2009

Pizza D'Oro


A slice of the pepperoni, ham, mushroom, onion, and black olive pie from Pizza D'Oro.

About a year ago, we picked up pizza from Pizza D'Oro. Since it had been awhile and we couldn't remember any complaints about it, if we had them at all, we figured we'd visit again.

When we picked it up, we observed the sides of the box were open and the lid was taped down -- and suddenly we remembered it was just like previous pizza(s) we'd picked up from Pizza D'Oro:

The large pie is too large for the large box!

Tawnya opened the box for our approval and we quickly glanced at it, noting that no toppings requested were erroneously added or omitted.

We got the pie home and took a closer look:

There it is, crust edging nearly OUTSIDE the box!


Thin crust, thick pieces of ham, fresh mushrooms, pepperoni, diced onion and irregularly cut black olives. Hmm. Promising.

Pick up a slice and it was...limp. Damn. Rodney required a fork. I flipped the limp point up over the slice toward the crust and ate it that way, grease running down my hand.

Taste-wise it was alright, better than average, and it was evident the ingredients were fresh and quite possibly cut in-house.  For the price though, disappointing. This limp thing was $23! 

----------------------------------------------------------------------------
05/31/09

I warmed a slice up for late breakfast in a skillet and it was MUCH better! Put some hmph in the crust.


Thursday, May 28, 2009

Shrimp, Tomato and Basil Pasta Revisited

When I posted this, I mentioned that I'd decrease the amount of water and/or increase the cook time.

Well, I did that:

I decreased the amount of water added from 2 to 1 cups and


increased the cook time from 15 minutes to 20.

It still looks a little soupy in the second photo, but man! Made a world of difference! Even Rodney noticed.


Wednesday, May 27, 2009

Wilted Spinach Salad


Doesn't look like much, but Wilted Spinach Salad sure is tasty!

I had a bag of spinach in the fridge and couldn't remember what I had originally planned on doing with it (which is regular thing I need to remedy). So, we had salad.

Wilted Spinach Salad
courtesy of Better Homes and Gardens New Cook Book

5 oz. fresh baby spinach or torn spinach
1 c fresh mushrooms, sliced
1/4 c thinly sliced green onion (2)
Dash black pepper (optional)
3 slices bacon
1/4 c vinegar
2 tsp sugar
1/2 tsp dry mustard
1 hard-cooked egg, chopped

In a large bowl combine spinach, mushrooms and green onion. Sprinkle with pepper if desired; set aside.


For dressing, in a 12-inch skillet cook bacon until crisp. Remove bacon (and crumble it when you have a second), reserving 2 tbsp drippings in skillet (add salad oil if necessary). Stir vinegar, sugar and dry mustard into drippings. Bring to boiling; remove from heat.


Add spinach mixture. Toss mixture in skillet for 30-60 seconds or until spinach is just wilted.


Transfer spinach mixture to a serving dish. Add crumbled bacon and chopped egg; toss to combine. Serve immediately.


This was painless and was done quickly, which is always good. Rodney and I both liked it, so we'll definitely be having it again. When we were having it, Rodney mentioned that it would be good with honey. Duh!! Absolutely! Next time, I'll replace the sugar with honey and see how that works out.

Cost:
  • spinach: $1.99/6 oz = $1.99 (I used the whole bag)
  • mushrooms: $2.99/lb = $1.50
  • green onion: $0.39 = $0.10
  • bacon: let's say $0.50
Total: $4.09. It's supposed to serve 4, but it only served the two of us as we were waiting for the leftovers to warm up. And we're pigs.


Tuesday, May 26, 2009

Sometimes...


Rodney makes beef pot roast!


Monday, May 25, 2009

Easy Risotto


Steaming hot risotto rice with Broiled Lemon Chicken.

Here's a new side we tried to go with Broiled Lemon Chicken (the second time we had it this week!). It's a quick and easy one from Better Homes and Gardens.


1/3 c chopped onion
1 tbsp butter
2/3 c uncooked arborio or long grain rice
2 c water
1 tsp instant chicken boullion Better Than Bouillon, the chicken kind
Dash black pepper
1/4 c grated Parmesan cheese

In a medium saucepan cook onion in hot butter until tender; add rice. Cook and stir for 2 minutes more.
 

Carefully stir in water, Better Than Bouillon, and pepper. Bring to boiling; reduce heat. Simmer, covered, for 20 minutes (do not lift cover).
 

Remove saucepan from heat. Let stand, covered, for 5 minutes. Rice should be tender but slightly firm, and the mixture should be creamy. (If necessary, stir in a little water to reach desired consistency.)


Stir in Parmesan cheese.


Done in about 30 minutes and it was pretty good. I'd tried the "hard" version of BHG's risotto sometime in the past and I think it came out better than this one. I was a little worried that it would be soupy when I checked it after the standing period. When I pushed the rice around, there was quite a bit of moisture in the bottom of the pan. It worked out well though, not soupy at all!

Cost:
I'd guess about $5. I know the arborio rice I bought (a few months back) was pretty pricy, but the rest of the items are reasonable. If you had to buy everything specifically to make this recipe, I'd expect it to be about $10-15.

In the future, I'll try the "hard" method and see how it compares.


Sunday, May 24, 2009

Spice racks

New spice racks! All of my standard spice containers fit wonderfully into these $10 spice racks that I got from Cost Plus World Market. I really like them because they don't require special containers to fit in the rack like these monstrosities. They are simple, have little rubber feet and are easily wall-mounted if that's your thing.

I opted not to wall mount because they'd have to go where the shelf is and I wanted to be able to accomodate ALL of my solids, even the ones in giant Costco-sized containers like the pepper grinder, cinnamon, sea salt etc.

I bought three of them: one for peppers (cayenne, white, chipotle etc.), one for ground items (mustard, ginger etc.) and one for whole spices (whole cloves, whole allspice berries etc.). How awesome is that?!

Yep, I'm a happy camper!

Saturday, May 23, 2009

Where the Magic Happens

Let me explain my kitchen. I live in an apartment and the kitchen is kinda goofy and pretty dinky. The cabinetry is flush to the ceiling, which means it's not exactly user-friendly unless you're at least 6.5' tall. I can reach everything on the bottom shelves. For the top shelf, I need a step-stool and stretch to reach what's up there. Even the microwave, mounted under the cabinetry over the stove, is too high up. I'm 5'6 or 5'7 and I look up into it.

Along one wall is tiny counterspace, the oven/stove (above which is the microwave), small counterspace (home of the dish drainer), sink, a little more tiny counterspace (home for dirty dishes) and the fridge. It's not by oversight that I didn't mention a dishwasher.

Opposite that wall is where we have a sales counter from a clothing/department store a great neighbor-friend graciously bestowed upon us shortly after we moved in. That bad boy increased the working space by at least 5 times and offers me a bunch of built-in shelving that serves as my pantry and additional storage. It is a great item and it's highly likely we'd have moved if I didn't have it. Over the past year, my ingredient collection and love for all things bulk required a little bit of improvement.

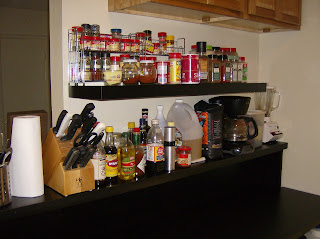
We decided to visit IKEA and find out what we could do to help minimize the clutter. I mean, look at it!

All of my dry and wet goods are jammed together and stacked up on the counter. Anytime Rodney got near it to make coffee, he was worried about an avalanche.  Notice the amount of wall available above that.

With the addition of one $20 shelf, I was able to spread everything out so I can easily see and reach each item without a bunch of things toppling resulting in a bunch of cursing. Plus, with the extra room, I can be comfortable with accruing more neato ingredients. Look how comfy the solids look on their new shelf:

See where the shelf is? It's just a couple inches lower than eye-level. Standing flat-footed, I can reach the corner of the cupboard doors to open them. The Jolly Green Giant must have put them in.

If you're not careful installing the shelf it may wind up completely ghetto. It will slant down toward the floor, look crazy, and won't work out too hot as a shelf. Maybe a neat location to tape recipes from which you are working, but not as a shelf. Should that happen, review the directions and de-ghetto it (like Rodney did).

Orechiette with No-Cook Tuna Sauce


This time with cappelletti pasta instead of shells!

I made this again for a quick meal after a trip to Costco, where I bought some cappelletti pasta.

The pasta came in a pack of six 1.1 lb bags with two bags each of three different pastas for $7.49, which works out to $1.25 a bag.

Oh, how did it taste? Great! I liked the texture of the "little hats". 


Friday, May 22, 2009

Green Beans Amandine


Green Beans Amandine served with Broiled Lemon Chicken.

Earlier I noticed that we have baked potatoes a lot. So, to focus on some new sides, I went with a simple one I had in my Better Homes and Gardens cookbook:

Green Beans Amandine

8 oz fresh green beans or one 9-ounce package frozen cut or French-cut green beans
2 tbsp slivered almonds
1 tbsp butter or margarine
1 tsp lemon juice

Cut fresh beans into 1-inch pieces (or, slice lengthwise for French-cut beans).


Cook fresh green beans, covered, in a small amount of boiling salted water for 10 to 15 minutes (5 to 10 minutes for French-cut beans) or until crisp-tender. (Or, cook frozen beans according to package directions.) Drain; keep warm.


Meanwhile, in a small saucepan cook and stir almonds in melted butter over medium heat until golden. Remove from heat; stir in lemon juice.


Stir almond mixture into beans.


A beautiful side, done in less than 30 minutes!

I was worried the nuts would taste burnt since they were more black than golden, but it turned out alright. We both liked it, Rodney more than me. He's a fan of nuts; me, not so much.

Cost:
  • green beans: $1.49/lb
  • almonds: um, $2/oz?
  • lemon: $0.40
Total: $3.89. We used nearly a pound of beans and used a fresh lemon.

Yep, will have this again.  Definitely.


Broiled Lemon Chicken


Broiled Lemon Chicken thigh and leg served with some Green Beans Amandine.

Last time, I didn't have a lemon. This time I did. What a difference! Be sure to have a lemon when you make this one.

Grilled Lemon Chicken

1/3 c white distilled vinegar
2 tbsp butter
2 tbsp vegetable oil
2 tbsp fresh lemon juice
2 tsp steak sauce
2 tsp grated lemon peel
1 tsp salt
1 (4- to 4 1/2-lb.) chicken, cut up

Bring vinegar, butter, oil, lemon juice and steak sauce to a boil in small saucepan over medium heat. Remove from heat. Stir in lemon peel and salt.
 

Line broiler rack with foil; cut slits into foil to allow for some drainage. Broil chicken for 10 minutes.


Brush with lemon mixture. Turn; cook an additional 20 to 30 minutes or until chicken juices run clear, brushing and turning chicken every 10 minutes.


Yes, much improved with the fresh lemon and peel! Amazing. This recipe certainly moved up in the ranks of things we'll have again.

Cost:
  • chicken: $0.77/lb = $4.05
  • lemon: $0.70/lb = $0.40
Total: $4.45.


Sunday, May 17, 2009

Beer-Braised Pork with Bacon


Pork, carrots, parsnips, onions, celery, and potatoes all cooked in a single dish.  Well, except for that skillet.  So, ok, pork, carrots, parsnips, onions, celery, and potatoes all cooked in two dishes.

I decided to do Beer-Braised Pork with Bacon again except this time I used a pork picnic. A while ago, I made pernil and one of the things I thought would improve it would be to braise it. What a better way to find out how that would work than to try it with a recipe I've already proven is excellent?

I prepped the 6 lb hunk of pork by removing the skin and excess fat.


Heat oven to 325ºF.

Cook bacon in large skillet over medium heat until browned and crisp; drain on paper towels. Reserve drippings in skillet.

Cook pork in drippings over medium-high to medium heat 5 to 6 minutes or until browned on all sides.
 
This thing just barely fit in my big skillet.

Reserve 2 teaspoons of the drippings in skillet; discard remaining drippings.

Place pork in shallow roasting pan large enough to hold pork surrounded by vegetables. Sprinkle with 1/2 teaspoon of the salt, sage and 1/4 teaspoon of the pepper.


Cook onion, shallots and garlic in drippings over medium heat 3 minutes, stirring occasionally. Scatter around pork.


Add beer (I used Black Toad again) to skillet; boil over high heat 2 minutes or until reduced to 1/2 cup, stirring to scrape up any browned bits from bottom of skillet. Add broth; bring to a boil. Pour around pork; cover tightly with foil.


Bake 1 hour 20 minutes.


Scatter potatoes, carrots, parsnips and celery around pork; sprinkle vegetables with remaining 1/4 teaspoon each salt and pepper. Sprinkle bacon over vegetables.
 

Bake, covered, an additional 1 hour or until pork is fork-tender and pale pink in center. Let stand 10 minutes before slicing.


MMM!! It smelled and looked so good!

Like last time, it took 3 hours to make, but wasn't a whole lot of work. Chop some stuff and let the oven do it's thing.

It tasted good, but I have to admit it was a lot better with the butt roast. Maybe the amount of braising time wasn't enough for this? It was still a little tougher than I'd hoped, but texture was much better than it was when I'd made pernil. Maybe there is something to the original recipe when it said to use a roast 3.5" thick.  Huh. 

Cost:
  • bacon: $2.99/lb = $1.55
  • pork picnic: $0.99/lb = $6.04
  • onion: $0.39/lb = $0.20
  • shallots: $2.29/lb = $0.71
  • beer: $1/12 oz
  • potatoes: $0.49/lb = 1.07
  • carrots: um, $0.50
  • parsnips: $1.39/lb = $1.74
  • celery: $0.79/bunch = $0.10
Total: $12.91. Not bad.

While I will definitely do this recipe again, I think I'll stick with the butt roast. Should I try it again with a picnic, I'll use more braising liquid or flip the roast half-way through.  And maybe I'll extend the first oven time but stick with the rest of the recipe.

Oh, and one other thing...the parsnips were really, uh, rooty I guess. The outer part was soft but the center core was hard. Maybe the ones I used were too big? I'll have to read up on how to select a good parsnip.