Pages

Monday, May 31, 2010

Fusilli with Grilled Chicken and Vegetables

Pasta with grilled zucchini and chicken as well as tomatoes and fresh basil tossed in a light oil mixture is delicious anyway but also perfect pseudo-primavera for those lactose-intolerant folks as it's completely free of dairy.

Flipping through my May/June (or was it June/July?) copies of Cooking Club (formerly known as Cooking Pleasures) magazine, I came across this recipe. Since it was for two, I doubled the recipe since I wanted enough for Rodney and me for dinner and another serving for me to have at lunch tomorrow.  The pantry was scarce of fusilli, but half-boxes of penne and shells were available.  I decided to use the remainder of each, a total of one pound of pasta.    

Fusilli with Grilled Chicken and Vegetables

1/2 c lemon juice
1/2 c olive oil
8 tbsp chopped fresh basil, divided
4 tsp minced garlic
1 tsp salt
1/2 tsp pepper
4 boneless skinless chicken breast halves
2 medium zucchini, halved lengthwise
1 lb. fusilli or any spiral or tube-shaped pasta
1 c cherry or grape tomatoes, halved

Heat grill or grill pan.

Whisk lemon juice, oil, 2 tablespoons of the basil, garlic, salt and pepper in small bowl or measuring glass.


Brush chicken and zucchini with 2 tablespoons of the lemon mixture. Grill, covered (or not), over medium heat or coals 8 to 10 minutes or until chicken is no longer pink in center and zucchini is crisp-tender, turning once.


Remove chicken and zucchini. Cover loosely with foil; let stand 5 minutes before chopping into bite-size pieces.

Meanwhile, cook pasta according to package directions. Drain; return to pot. Toss with remaining lemon mixture, chicken, zucchini, tomatoes and remaining basil.


Serve warm or at room temperature.


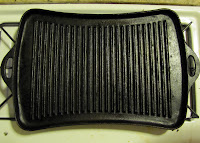
Pretty simple and straightforward.  If you have a grill, as in a real grill, the dish will no doubt have more of a yummy charcoaly-grilly flavor.  As it is for me, it looks grilled but isn't quite the same.  Regardless, I like cooking on this cast iron.

Looking at how much oil mixture there was and how simple the seasonings were, I thought the dish would be too oily and the flavors too mild.  Fortunately, I used four times the pasta required and it worked out perfectly. And really, if you don't have four breasts, two or three would probably work as there was some chicken for each bite.  Reserve some of the pasta cooking water if you're worried about it being too dry.  If zing is a requirement, consider some crushed red pepper or Tabasco. A nice cheese would compliment this well too.

Overall, it was a nice summery sort of dish, not too heavy which is preferable when it's blazing hot outside.  I'll remember this recipe when it gets to be blazing hot here.

Cost:
  • basil: $1.52/bunch
  • chicken breasts: $2.07, assuming 3 lbs at $0.69/lb
  • zucchini: $1.17
  • pasta: $0.99/lb
  • grape tomatoes: $1.49/pint
Total: $7.24 or $1.81 for each of four servings.


Food Plan and Grocery List, 053110

After farting around all day looking at potential places to golf and then not going at all, I figured I may as well get a food plan together so I could feel that I accomplished something on this holiday. It has been 4 weeks since I concocted a food plan and 5 weeks since I did a semi-decent attempt at completing one. Besides, I recently cleaned the fridge.

This week's line-up:

  • Fusilli with Grilled Chicken and Vegetables
  • Hoisin-Glazed Chicken Thighs
    • rice and kimchi
  • Maple-Bourbon BBQ chicken
    • Corn, Basil and Orzo Salad
  • Dynamite Bourbon Ribs
    • Crash Hot Potatoes
  • Spiced Panko-Crusted Pork Chops
    • Roasted Potatoes and Green Beans
So I went shopping, doing my usual trip to Grower's Direct followed by a stop at Stater Bros.

The Meat House:
  • cumin: $3.99/7 oz
  • TOTAL: $3.99
Grower's Direct:
  • limes: $.52/0.40 lb
  • zucchini: $1.17/1.18 lb
  • russet potatoes: $0.73/1.49 lb
  • red bell pepper: $1.03/0.52 lb
  • green beans: $2.51/1.40 lb
  • garlic bulb: $0.47/0.19 lb
  • ginger root: $0.21/0.14 lb
  • romaine lettuce: $0.89/head
  • fresh basil: $1.52/bunch
  • baby red potatoes: $2.79/pack
  • grape tomatoes: $1.49/pint
  • TOTAL: $13.33
Stater Bros.:

  • milk: $1.49/qt
  • cream cheese: $1.50/8 oz
  • eggs: $2.59/18
  • crushed pineapple: $1.79/16 oz
  • whole chicken: $3.23@ $0.69/lb
  • whole chicken: $3.12
  • whole chicken: $3.22
  • whole chicken: $3.38
  • white corn in husk: $1.75/7 ears
  • Jim Beam bourbon: $12.99
  • TOTAL: $33.61
HMart, 060210

  • sliced kimchi: $3.98
  • Samyang ramen: $9.99/20 packs
  • TOTAL: $13.97
Grand Total: $84.54

Friday, May 28, 2010

Cost of Lunch, Week Ending 052810

Not much cooking going on at home, so a lot of eating out at lunch:

  • Monday: Schlotzky's, Combination Pizza and soda: $8.24
  • Tuesday: Jack in the Box, Southwest Chicken Salad with Grilled Chicken: $5.71
  • Wednesday: Subway, 6" Spicy Italian on Wheat with everything on it: $4.35
  • Thursday: Subway, 6" Spicy Italian on Wheat with everything on it: $4.35
  • Friday: La Salsa: Original Burrito with Chicken: $6.36
Total: $29.01.

Thursday, May 27, 2010

Winning an iPad...and what to with it


I took a vendor's on-line survey at work. The prize was an iPad. I took the survey without any intention or hopes of winning the iPad as I had no idea what the hell to do with it if I'd won.

So I won it.

Between the time I found out I'd won it and received it, I did some Googling.

This iPad will replace any recipes I would otherwise print out. It's a small laptop/TV right in my kitchen! And I love the Epicurious ap, I'm sure I'll find it quite handy.

I did have to get a wireless router (I selected Belkin as I've used their products at work and low cost) to be able to use the iPad at home since I only have a cable-internet to my permanently-located desktop, but that was only $40 and very easy to install.

Looking forward to getting a ton of kitchen use from this gadget!

Monday, May 24, 2010

Shrimp, Tomato and Basil Cavatappi


Usually we have this pasta dish with linguine. Turns out cavatappi (double elbows) is just as suitable and honestly? Makes a much nicer presentation. It's zingy and zowie all at once. Don't you agree?

And as an FYI, I did use jumbo shrimp as they were on sale, buy one get one free.

Sunday, May 23, 2010

In-N-Out for dinner

In-N-Out Double-Double without onions, cheeseburger with onions, and fries

Rodney and I were hungry and since I didn't do any real grocery shopping, we went out to find what was open.  Seeing it was open, I became quite excited about the infamous California burger joint, In-N-Out.

As the name suggests, the drive-thru is always hoppin', meaning it's jammed with a line-up of cars at all hours of night and day. Fortunately, it is pretty quick.

I was surprised by how our to-go food came: in a box, burgers and fries exposed. Weird. Did they think we'd eat in the parking lot? However, I appreciated it as it didn't use much more paper product than what you'd get if you ate in when they give you a little red basket lined with paper. And the box? Recyclable.


By the time we got home, we'd eaten the majority of the fries. And those fries? The best I've had from In-N-Out yet. I'm not sure what this location did to make them that good, but they should let other stores know the secret.


As for the burgers, they weren't too bad. The onion was heavy, an entire slice from a big onion, but I liked that the tomatoes were thick and the lettuce leafy rather than shredded. I'm not too sure that I care for the Thousand-Island saucy stuff, but it is a nice change from mayo.

Cost:

  • cheeseburger with onion: $2.05
  • double-double without onion, medium combo with fries and Coke: $5.70
Total: $8.48.

Nearly half the price of an equivalent (though with large combo) from Carl's Jr.


Refrigerator Update and Cleaning

Remember when we bought our super awesome super giant new-to-us fridge? It was 9 months ago? Once in the kitchen and plugged in, I lovingly cleaned it and arranged the shelving and door buckets and strategically placed each refrigerated item.

Then I worked that fridge like a team of mules.

A couple months in, the door didn't want to close right, getting hung up on the little pushy-thing that when pushed, turns the light off, and when released, turns the light on. I think it had something to do with the multiple bulk (aka ultra-heavy) items from Costco in the strategically-placed door buckets, offsetting the door. Rodney rigged the little pushy-light-off-and-on-switch-thingy with the end of a tie-strap so the door would close properly. It still works to this day, that same tie-strap. Ahh, that 5 cent tie-strap. It prevented the $300 fridge from becoming a "big piece of crap" to me.

The spill-proof shelving has held true to their word. Anything spilled on a shelf did not trickle down to wet items below. Instead, the spilled goo (pork blood) stealthily pooled and dried, cementing whatever rarely-moved jar in the viscinity to it's original and nearly final location. Raw egg, somehow cracked against the wall of the fridge (at the top of course), flowed freely past each spill-proof shelf to pool at the bottom of the refrigerator directly beneath a clear crisper drawer.

Fruit flies, for some reason, have been drawn to the coolness of the refrigerator to be smothered, left to die at the bottom of the refrigerator, near the crusty egg pool.

Of course, I didn't realize all of this until I decided that since it had been a few weeks since I had put together a food plan that the fridge should be cleaned. Today would be a good day because I hardly bought anything perishable:

Even Spooky marveled at what is in the depths. But really, he is eyeballing his yellow-capped can of moist beefy chunks in tasty-to-cats gravy, better known as Friskies Beef in Gravy.

Working my way from top to bottom, as you'd wash a car, I moved items from the top shelf to those toward the bottom. Once the top shelf was clear of items, I removed it and washed it with warm soapy water in the shower-tub. Don't get grossed out or give me grief -- I don't have a sprayer thingy on the kitchen sink and the sink is only so big.

The clean shelf was allowed to drip-dry a bit before wiping dry with clean paper towel. The shelf was returned and items were returned to the top shelf; items that called the middle shelf home were moved to the top and the middle shelf was washed in the shower-tub. Good enough for the top shelf, good enough for the middle!

Once the middle shelf was returned to it's original location, bottom-shelf items were jammed into the top and middle shelves to clear the way of the bottom shelf. Crispers were also removed.

Leaving these black dots and big, yellow, crusty blob:


Black dots? Dead fruit flies.


Yellow blob? Raw egg, long dried. Petrified.


Warm, soapy water took care of both to leave this glowing loveliness:


In all, I combined two half-bottles of cran-raspberry juice; threw out 5 parmesan rinds (which I'll likely regret as I'll suddenly come across an awesome recipe that includes parmesan cheese rinds), half a soggy Jersey Mike's regular-sized Original Italian sandwich on wheat Mike's Way from lunch earlier, half a jar of apple sauce we'll never finish, some salsa in a small bowl; made worm food of old tomatoes, quince, butter lettuce, apples, oranges, herbs, cabbages, lettuces, and thawed bananas (bananas too long thawed for me).

Now that this baby is all cleaned out (including the door, though I forgot to collect proof), I'm ready to fill it again. Hopefully in more of a wise way -- with food we'll eat rather than make worm food from.


Tell me, how often do you clean your refrigerator and what do you find in there?

Grocery List, 052310

Again, no plan. I did make a stop to get some staples while on a hunt for Levi 550's. I'll update as I go along this week.

Costco:

  • Kirkland solid tuna: $23.98/16 7-oz cans
  • Kirkland organic salsa: $5.99/66 oz
  • Foster Farms turkey slices: $7.35
  • Guererro flour tortillas: $3.25
  • Kirkland tortilla chips: $6.18/6 lbs
  • organic minced garlic: $3.49/32 oz
  • Orowheat Oat-Nut bread: $5.49/2 loaves
  • TOTAL: $55.73
Stater Bros., 052510:

  • bone-in, skin-on chicken thighs: $8.54
  • TOTAL: $8.54
Costco, 053010:

  • Worcestershire sauce: $6.49/2*20 oz
  • turkey slices: $7.51
  • Honey-Nut Cheerios: $6.77/49 oz
  • Heinz Ketchup: $5.78/3*44 oz
  • vegetable oil: $6.49/5 qts
  • TOTAL: $33.04
Grand Total: $97.31.

Saturday, May 22, 2010

Honey and Soy Baked Chicken Thighs Marinated Overnight


This post is about the remaining thighs from the family pack I bought the other day. The first half I prepared for Honey and Soy Baked Chicken Thighs. The other half I prepared simultaneously for tonight's dish, Honey and Soy Baked Chicken Thighs Marinated Overnight. If you will recall, I wasn't sure if marinating was necessary or not, so I did it both ways.  So here we have it:

Honey and Soy Baked Chicken Thighs Marinated Overnight

3 tbsp olive oil
3 tbsp soy sauce
5 tbsp honey
4 cloves of garlic; minced
1/2 tsp ground ginger
1/2 tsp fresh ground pepper
2.5 lbs chicken thighs

Combine oil, soy sauce, honey, garlic, ginger and pepper in a large bowl. Add the chicken to bowl, mixing well to coat each piece. (See last nights post, Honey and Soy Baked Chicken Thighs, for these informative photos).

Allow chicken to marinate overnight, covered, in a bowl, turning once.

Bring chicken and marinade out of refrigerator to come to room temperature.


Preheat oven to 425°F.

Place chicken, skin-side up, in a greased 7x11 baking dish.

This 7x11 was lubed with olive oil from a MISTO. The chicken thighs were then gently squeezed into the dish.

Once the oven was hot, the dish of chicken was placed in the oven for 30 minutes.


The chicken, not done yet, was returned to the oven without turning, for an additional 20 minutes.

Here is where you can yell at me for not following the recipe: I should've turned the chicken, baked for 10 minutes, turned the chicken again and baked an additional 10 minutes.

Drain fatty-juices from baking dish; let chicken stand, covered, for about 5-10 minutes before serving.


Flavor was good, but I can't say you gain a lot from marinating overnight.  However, know that you can should your Rodney say something like, "Baby, I'm takin' you out tonight, so get ready to go." You can say, "It's about time. Let me just throw this chicken in the 'fridge before I get gussied up in one of my few stain-free Hane's t-shirts and clean pair of Levi's." Twenty-four hours later, you can pick up where you left off.

Next time I make this, I swear on a pile of my healthy garbage-eating worms that I'll actually follow the recipe all the way through.  Maybe the appearance will be a little more appetizing.

And doing it in a baking dish is not difficult to clean (soak it awhile before you get to scrubbin' if you're a poor sap like me who doesn't have a dishwasher) plus you don't waste the foil and all the resources to produce said foil.

Cost: $1.08 for each of three two-thigh servings.     

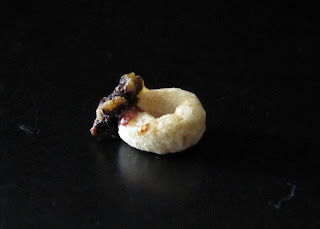
Melanoma Honey-Nut Cheerio


Rodney found this Cheerio in his cereal bowl this morning and saved it for me, otherwise destined to be drowned in soymilk and consumed.

It looks like a Cheerio without sunscreen on it's nose, or a rat/opossumed face-Cheerio hybrid.

Friday, May 21, 2010

Honey and Soy Baked Chicken Thighs


I swung by the store after work yesterday to pick up a couple things and saw chicken thighs were to be had for $0.89/lb. A family pack of bone-in, skin-on thighs later, I had to figure out what I wanted to do with them.


Relying on a quick "thigh" search via Tastespotting, I came across a simple, beautiful recipe by Amy at She Wears Many Hats. And I'll tell you right now that her chicken looked a helluvalot better than mine would turn out. Let me show you...

Honey and Soy Baked Chicken Thighs

3 tbsp olive oil
3 tbsp soy sauce
5 tbsp honey
4 cloves of garlic; minced
1/2 tsp ground ginger
1/2 tsp fresh ground pepper
2.5 lbs chicken thighs

Preheat oven to 425°F.

Combine oil, soy sauce, honey, garlic, ginger and pepper in a large bowl.

Add the chicken to bowl, mixing well to coat each piece.


Line a baking sheet with foil, place chicken and sauce/marinade on sheet, and bake in a 425°F oven for 25 minutes with the skin side down. Cook chicken an additional 8 minutes.

Turn the chicken and cook another 7 minutes, or until internal temperature reaches 165°F, to crisp up the skin.


Ok, I did change a couple of things, primarily in the cooking dish and method. But I have a reason! Listen here. The original recipe said to:

  1. preheat the oven
  2. mix everything in a bag to marinate in the fridge
  3. when ready to cook, dump everything into a baking dish; bake in the preheated oven
That tells me:

  1. the oven is on and the chicken, once mixed into the honey-soy mixture, is ready to cook or
  2. the oven was turned on prematurely and a marinating time is actually a good thing
The part I personally messed up on was to place skin-side down for the first 25 minutes (original recipe says skin-side up, which explains why I didn't turn the chicken when it came out of the oven the first time but did turn it to crisp the skin). And I used a foil-lined baking sheet instead of a dish.

If it's any salvation, I was able to determine that 40 minutes total cooking time was sufficient, shaving off 10 minutes. Doesn't that redeem me in any way?

The chicken tasted good even though the sugars were burnt on the skin. We wound up eating ours skinless, so the flavors were quite mild, but still tasty, reminiscent of the Honey-Soy Drums made months ago.

Cost:

  • chicken thighs: $2.23
  • everything else, SWAG: $1
Total: $3.23 or $1.08 for each of three 2-thigh servings.

Sunday, May 16, 2010

Slow Oven-Grilled Whole Sparerib Slab


Thinking back to when I first bought a slab of spareribs I remember I bought them just because they were on sale for $0.99/lb. Google searches for "cooking whole spareribs" or "how to trim spareribs" and "cooking spareribs" didn't help since I wanted to eat those ribs THAT NIGHT. I decided to prepare these ribs almost as-is, straight from the packaging. That's what I wound up doing way back then (2 years ago), but didn't have nearly as good a recipe.

If you've never prepared ribs before, don't have a grill, didn't consider marinating an option, don't even have a sharp knife to trim ribs if you wanted to, this post is for you.

Slow Oven-Grilled Whole Sparerib Slab
adapted from How to Cook Everything, Bittman

Equipment:
small bowl
baking sheet, 13x17" or a foil boat manufactured at home -- get creative
aluminum foil
butter knife
paper towel
saucepan
measuring spoons and cups
oven and stove-top
steak knife

Dry Rub:
1 1/2 tsp salt
1 tbsp sugar
1 1/2 tsp cumin
1 1/2 tsp fresh-ground black pepper
1 1/2 tsp chili powder
1 tbsp paprika
4-6 lb spareribs

Mix these ingredients in a small bowl.

Fast Barbecue Sauce:
2 c ketchup
1 tbsp Worcestershire sauce
1 tbsp chili powder
1/2 c water
1/2 c rice vinegar or distilled white vinegar, the same stuff you can clean your showerhead with
1/2 c minced onion
1 tsp minced garlic

After the ribs are in the oven, dump these these ingredients into a saucepan. Mix well and stir occasionally over medium heat about 10 minutes.

So here's this slab of ribs, purchases for $0.99/lb, about 5.5 pounds total.


First, crank the oven up to 300°F.

Get your largest baking/cookie sheet out -- hopefully it's about a 13x17". Just get the biggest thing you have that has a rim. Line it with foil. Ideally, there would be no holes or open creases in the bottom of the foil. You want to catch all the crap in the foil to prevent from having to throw away (or better yet, washing) your baking sheet.

Face your fears and cut the rib packaging open over the sink, letting whatever juicy/bloody mess pour out straight into the drain rather than the kitchen counter.

If you want, rinse the ribs. I didn't bother, but did dab the wettest portions with paper towel. Throw that slab onto the foil-lined baking sheet. When the slab hangs over the edge, do your best to tuck the slab ends to fit. If you have MAJOR overage, you might consider making a baking sheet/boat of foil.


Mix the dry rub ingredients now if you haven't already and sling half of it across the slab, rubbing it in with your fingers to cover the entire area.


Flip that slab over. Now you're faced with a meaty portion that turns into a loose boney mass (riblets), a hangy-flappy portion (skirt) and an obviously rib portion (ribs).


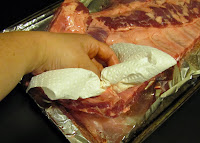
The objective now is to remove the thin membrane from the rib portion. With a butter knife, peel the membrane up from between two bones. Once you see it loosening, work that knife in there so it's loose enough to grab with a paper towel.


Using paper towel, grab that slippery membrane edge and peel. It might tear (like mine did), but just grab another loose edge and peel some more. Remove as much as you can. It should just take a minute or two to do.  You'll really be surprised at how easy this is. 

You could skip this step, but it seems to me that you'd want to do it just so your rub is not hindered from doing it's job by a membrane, which is sort of like an impenetrable plastic skin.

Sprinkle the remaining half of dry rub over the membrane-free rib slab, rubbing it with your fingers to cover the entire slab with seasoning.


Flip the slab back over, rubbing the rub around some more if it isn't even. Place the slab and baking sheet in the oven, on the middle rack. Don't worry about covering it, just get it in there and note the time*.


In two hours, remove the ribs from the oven and you should see something like this.

Crank the oven up to 500°F. Drain the runny fat off into a cat food can or an olive jar or anything you have that's not plastic. Don't dump it down the drain or you're potentially asking for nightmare that includes a visit from the plumber and, depending on where you live, a fine from the city.

Slather that slab with some of the BBQ sauce you've prepared. Put the ribs in the 500°F oven.


After 10 minutes, pull the ribs from the oven. They should look something like this.


Slather the ribs with some more BBQ sauce.


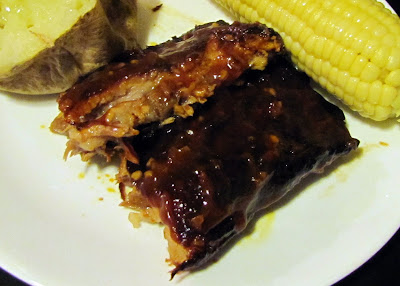
Carve away at the ribs, separating the meaty/riblet flap from the spareribs. Cut the ribs into serving size portions, 2-3 bones per piece.


And serve with the remaining BBQ sauce, there should be plenty.


Painless, right?

Truth be told, cutting the ribs into serving sized pieces was more difficult than trimming the ribs before cooking. When raw, you can actually see joints and skirt and riblets. Once cooked, it's just a big mass and you kind of want to know what you're doing. I had a hard time and I've trimmed ribs a few times by now.

Whatever you do, don't throw away anything but bone and little bits of fatty parts.  If you have a big portion of anything that isn't bone, you're wasting some edible flesh.  Trust me.  If you made these at home, you're in the privacy of your home.  Don't be shy about getting all Fred Flintstone on the ribs and riblets and skirt and meaty flappy thing. Get dirty.

*If you have potatoes, scrub them clean and put them in with the ribs after the ribs have been in the oven an hour. The potatoes will be done when the ribs come out before the 500°F finish. If you have corn-on-the-cob, about 30 minutes before the ribs come out before the 500°F, get a big pot, fill it with water and dump in a bunch of salt. Get the water boiling and place the cleaned ears in there for 6 minutes. Scratch that boil corn business - baked corn is much simpler!